* Update intro.md

* Update intro.md

* Update intro.md

* Update intro.md

* Update intro.md

* Update intro.md

* Update intro.md
8.3 KiB
title
| title |
|---|
| Getting Started |
Making a Ping-Pong bot
One of the first steps to getting started with the Discord API is to write a basic ping-pong bot. We will expand on this to create more diverse commands later, but for now, it is a good starting point.
Creating a Discord Bot
Before you can begin writing your bot, it is necessary to create a bot account on Discord.
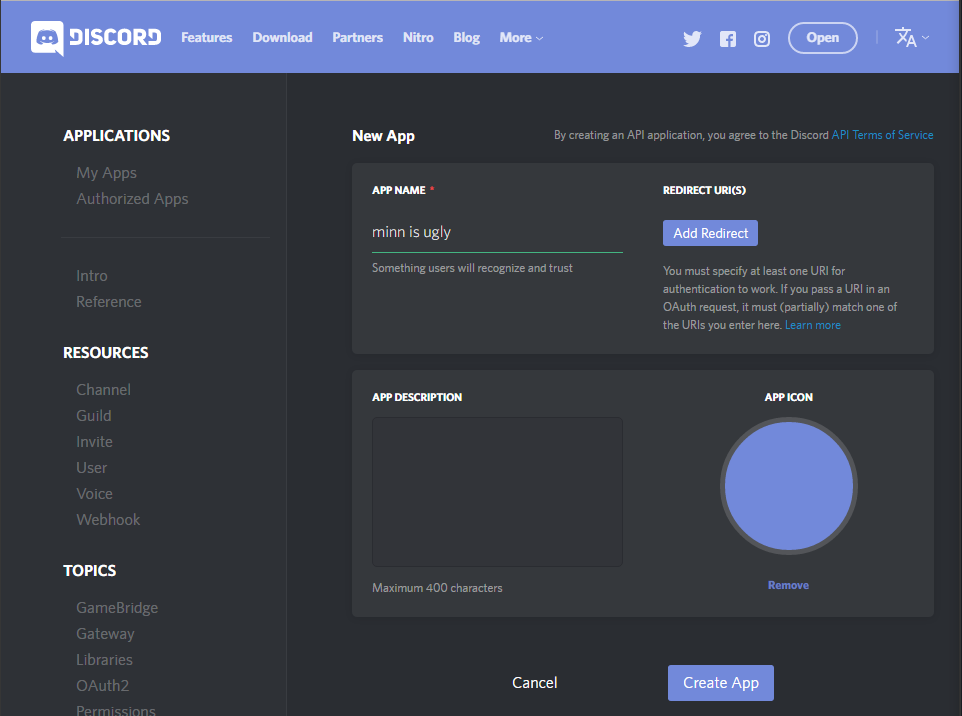
- Visit the Discord Applications Portal
- Create a New Application
- Give the application a name (this will be the bot's initial username).
- Create the Application
- In the application review page, click Create a Bot User
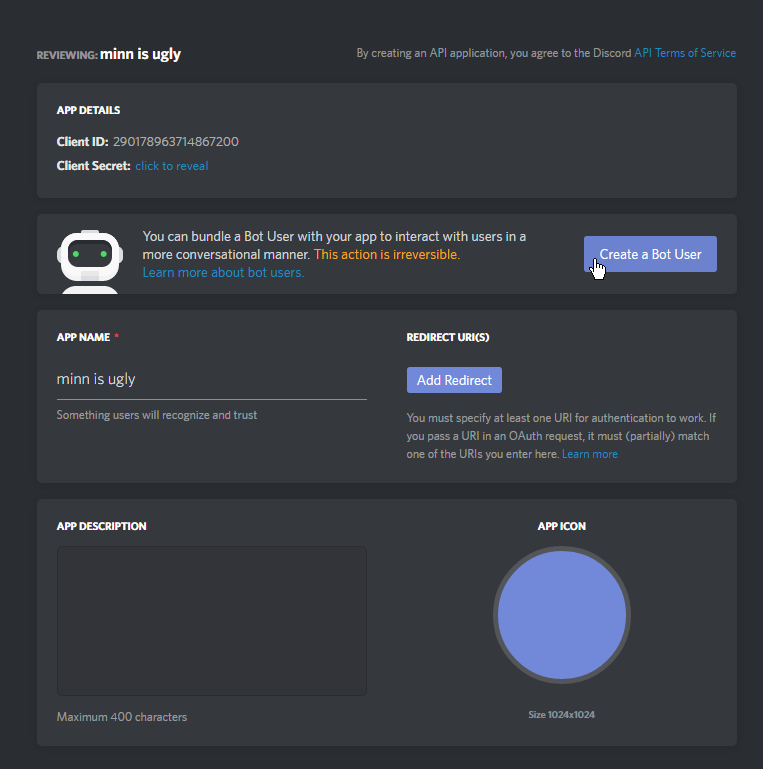
- Confirm the popup
- If this bot will be public, check 'Public Bot'. Do not tick any other options!


Adding your bot to a server
Bots can not use invite links, they must be explicitly invited through the OAuth2 flow.
- Open your bot's application on the Discord Applications Portal
- Retrieve the app's Client ID.

- Create an OAuth2 authorization URL
https://discordapp.com/oauth2/authorize?client_id=<CLIENT ID>&scope=bot - Open the authorization URL in your browser
- Select a server
Note
Only servers where you have the
MANAGE_SERVERpermission will be present in this list.
- Click authorize

Connecting to Discord
If you have not already created a project and installed Discord.Net, do that now. (see the Installing section)
Async
Discord.Net uses .NET's Task-based Asynchronous Pattern (TAP) extensively - nearly every operation is asynchronous.
It is highly recommended that these operations be awaited in a properly established async context whenever possible. Establishing an async context can be problematic, but not hard.
To do so, we will be creating an async main in your console application, and rewriting the static main method to invoke the new async main.
[!code-csharpAsync Context]
As a result of this, your program will now start, and immidiately jump into an async context. This will allow us later on to create a connection to Discord, without needing to worry about setting up the correct async implementation.
Tip
If your application throws any exceptions within an async context, they will be thrown all the way back up to the first non-async method. Since our first non-async method is the program's Main method, this means that all unhandled exceptions will be thrown up there, which will crash your application. Discord.Net will prevent exceptions in event handlers from crashing your program, but any exceptions in your async main will cause the application to crash.
Creating a logging method
Before we create and configure a Discord client, we will add a method to handle Discord.Net's log events.
To allow agnostic support of as many log providers as possible, we log information through a Log event, with a proprietary LogMessage parameter. See the API Documentation for this event.
If you are using your own logging framework, this is where you would invoke it. For the sake of simplicity, we will only be logging to the Console.
[!code-csharpAsync Context]
Creating a Discord Client
Finally, we can create a connection to Discord. Since we are writing a bot, we will be using a DiscordSocketClient, along with socket entities. See the terminology if you're unsure of the differences.
To do so, create an instance of DiscordSocketClient in your async main, passing in a configuration object only if necessary. For most users, the default will work fine.
Before connecting, we should hook the client's log event to the log handler that was just created. Events in Discord.Net work similarly to other events in C#, so hook this event the way that you typically would.
Next, you will need to 'login to Discord' with the LoginAsync method.
You may create a variable to hold your bot's token (this can be found
on your bot's application page on the Discord Applications Portal).

Important
Your bot's token can be used to gain total access to your bot, so do NOT share this token with anyone! It may behoove you to store this token in an external file if you plan on distributing the source code for your bot.
We may now invoke the client's StartAsync method, which will
start connection/reconnection logic. It is important to note that
this method returns as soon as connection logic has been started!
Any methods that rely on the client's state should go in an event handler.
Note
Connection logic is incomplete as of the current build. Events will soon be added to indicate when the client's state is ready for use; (rewrite this section when possible)
Finally, we will want to block the async main method from returning until after the application is exited. To do this, we can await an infinite delay, or any other blocking method, such as reading from the console.
The following lines can now be added:
[!code-csharpCreate client]
At this point, feel free to start your program and see your bot come online in Discord.
Tip
Encountering a
PlatformNotSupportedExceptionwhen starting your bot? This means that you are targeting a platform where .NET's default WebSocket client is not supported. Refer to the installing guide for how to fix this.
Handling a 'ping'
Now that we have learned how to open a connection to Discord, we can begin handling messages that users are sending.
To start out, our bot will listen for any message where the content
is equal to !ping, and respond back with Pong!.
Since we want to listen for new messages, the event to hook in to is MessageReceived.
In your program, add a method that matches the signature of the
MessageReceived event - it must be a method (Func) that returns the
type Task, and takes a single parameter, a SocketMessage. Also,
since we will be sending data to Discord in this method, we will flag
it as async.
In this method, we will add an if block, to determine if the message
content fits the rules of our scenario - recall that it must be equal
to !ping.
Inside the branch of this condition, we will want to send a message
back to the channel from which the message came - Pong!. To find the
channel, look for the Channel property on the message parameter.
Next, we will want to send a message to this channel. Since the
channel object is of type SocketMessageChannel, we can invoke the
SendMessageAsync instance method. For the message content, send back
a string containing 'Pong!'.
You should have now added the following lines:
[!code-csharpMessage]
Now, your first bot is complete. You may continue to add on to this if you desire, but for any bot that will be carrying out multiple commands, it is strongly encouraged to use the command framework, as shown below.
For your reference, you may view the completed program.
Building a bot with commands
This section will show you how to write a program that is ready for commands. Note that this will not be explaining how to write commands or services, it will only be covering the general structure.
For reference, view an annotated example of this structure.
It is important to know that the recommended design pattern of bots should be to separate the program (initialization and command handler), the modules (handle commands), and the services (persistent storage, pure functions, data manipulation).
todo: diagram of bot structure