* Merge https://github.com/Discord-Net-Labs/Discord.Net-Labs into patch/labs3.5.0

* Add missing periods
4.6 KiB
uid, title
| uid | title |
|---|---|
| Guides.GettingStarted.Installation | Installing Discord.Net |
Discord.Net Installation
Discord.Net is distributed through the NuGet package manager; the most recommended way for you to install this library. Alternatively, you may also compile this library yourself should you so desire.
Supported Platforms
Discord.Net targets .NET 6.0 and .NET 5.0, but is also available on older versions, like .NET Standard and .NET Core; this still means that creating applications using the latest version of .NET (6.0) is most recommended. If you are bound by Windows-specific APIs or other limitations, you may also consider targeting .NET Framework 4.6.1 or higher.
Warning
Using this library with Mono is not supported until further notice. It is known to have issues with the library's WebSockets implementation and may crash the application upon startup.
Installing with NuGet
Release builds of Discord.Net will be published to the official NuGet feed.
Development builds of Discord.Net, as well as add-ons, will be published to our MyGet feed. See @Guides.GettingStarted.Installation.Nightlies to learn more.
Using Visual Studio
-
Create a new solution for your bot
-
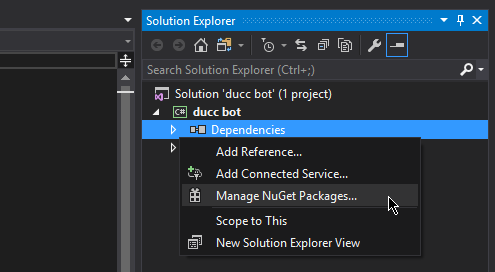
In the Solution Explorer, find the "Dependencies" element under your bot's project
-
Right click on "Dependencies", and select "Manage NuGet packages"
-
In the "Browse" tab, search for
Discord.Net -
Install the
Discord.Netpackage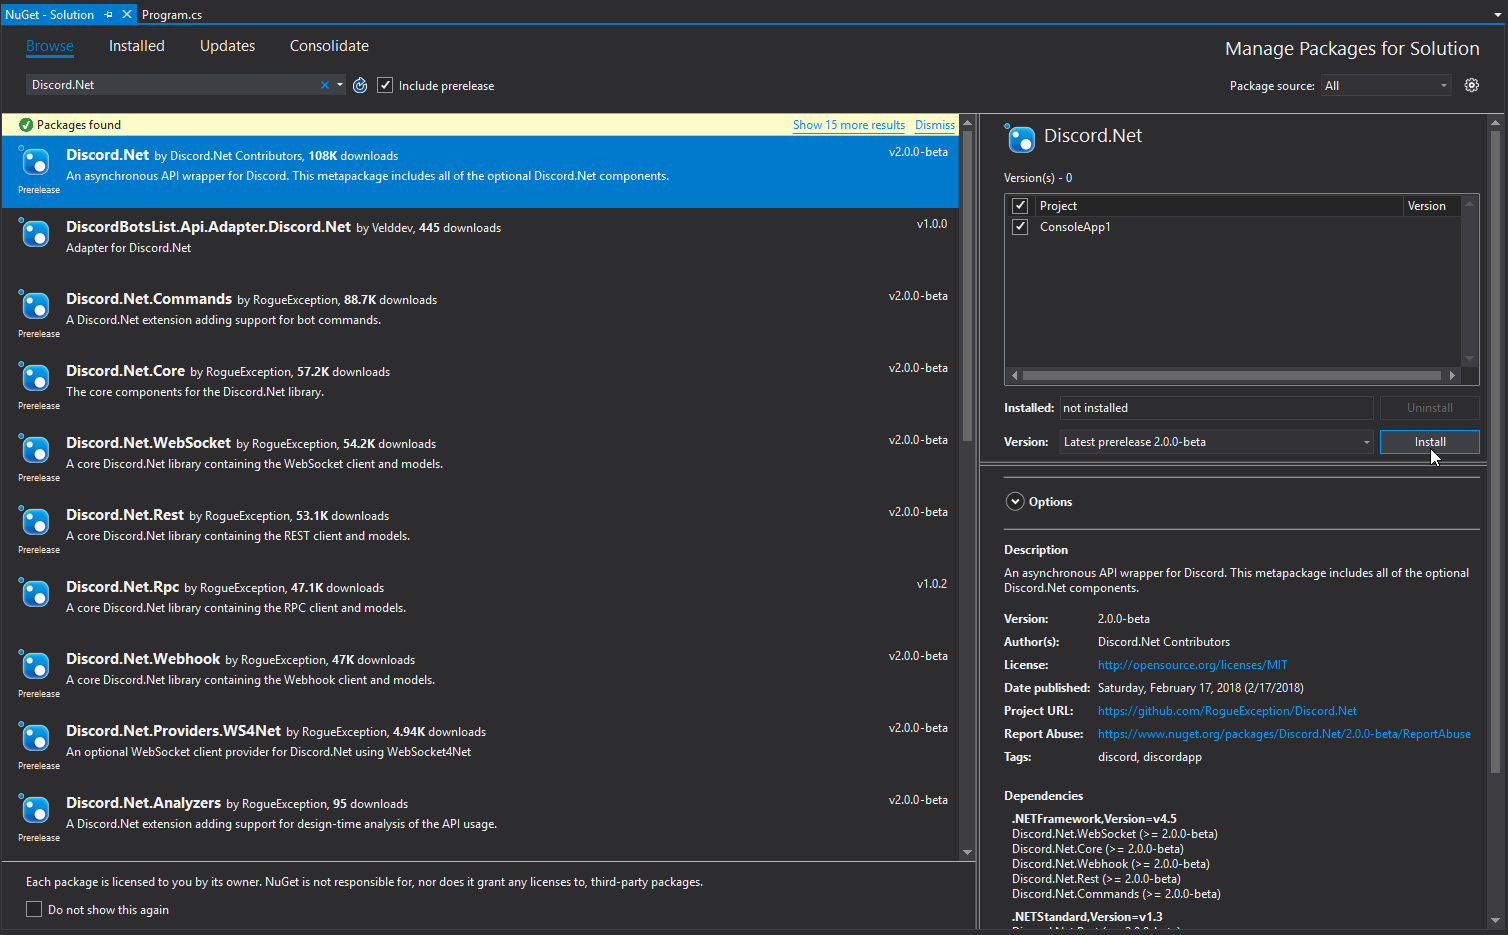


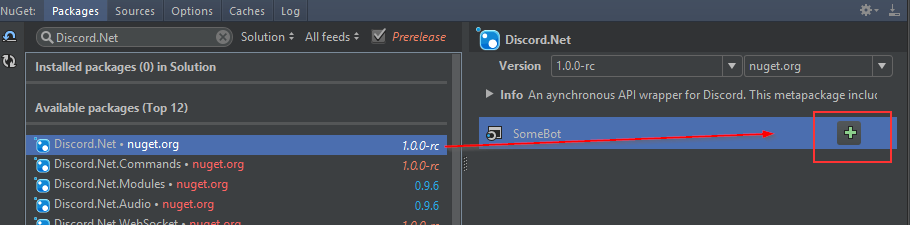
Using JetBrains Rider
-
Create a new solution for your bot
-
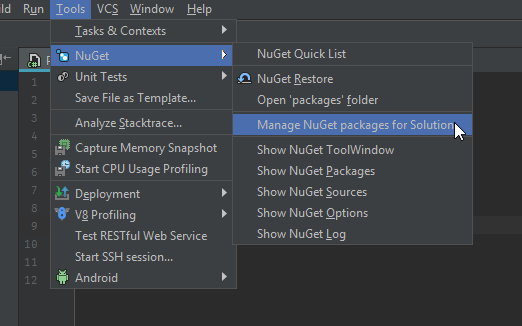
Open the NuGet window (Tools > NuGet > Manage NuGet packages for Solution)
-
In the "Packages" tab, search for
Discord.Net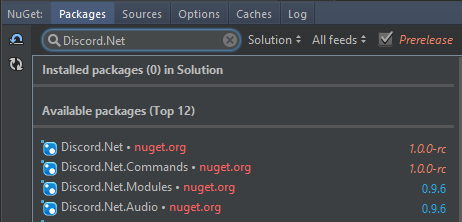
-
Install by adding the package to your project


Using Visual Studio Code
- Create a new project for your bot
- Add
Discord.Netto your*.csproj
[!codeSample .csproj]
Using dotnet CLI
- Launch a terminal of your choice
- Navigate to where your
*.csprojis located - Enter
dotnet add package Discord.Net
Compiling from Source
In order to compile Discord.Net, you will need the following:
Using Visual Studio
- Visual Studio 2019 or later.
- .NET 5 SDK
The .NET 5 workload is required during Visual Studio installation.
Using Command Line
Additional Information
Installing on Unsupported WebSocket Platform
When running any Discord.Net-powered bot on an older operating system (e.g. Windows 7) that does not natively support WebSocket, you may encounter a @System.PlatformNotSupportedException upon connecting.
You may resolve this by either targeting .NET Core 2.1 or higher, or by installing one or more custom packages as listed below.
Targeting .NET Core 2.1
- Download the latest [.NET Core SDK].
- Create or move your existing project to use .NET Core.
- Modify your
<TargetFramework>tag to at leastnetcoreapp2.1, or by adding the--framework netcoreapp2.1switch when building.
Custom Packages
-
Install or compile the following packages:
Discord.Net.Providers.WS4NetDiscord.Net.Providers.UDPClient(Optional)- This is only required if your bot will be utilizing voice chat.
-
Configure your DiscordSocketClient to use these custom providers over the default ones.
* To do this, set the `WebSocketProvider` and the optional
`UdpSocketProvider` properties on the [DiscordSocketConfig] that you
are passing into your client.
[!code-csharpExample]